Anybody who has done any study of tactics knows that movement is an essential component of survival.
“He who plants his feet finds the rest of himself planted soon thereafter.”
–Gabriel Suarez, victor in several gun battles
How we move has a lot to do with what we are trying to accomplish.
As a general rule, we are always trying to avoid trouble, avoid confrontation. Those of us who are armed on a daily basis only pack heat in case a fight is forced upon us. We don’t go looking for trouble.
I used to get paid to look for trouble. For example, murderers fleeing from a double homicide. That manhunt turned into a quadruple homicide (plus the demise of a bad guy) when we caught up with one of them–or should I say, when he found us.
It saddens me to re-live certain memories, but it frustrates me more when some people are so dogmatic they refuse to learn lessons others have paid for in precious, precious blood.
Contrary to what is apparently popular belief, when law enforcement officers encounter a person breaking the law or threatening others, they can’t just say “Looks like this won’t end well for somebody. Let’s go get a doughnut. We don’t want any trouble.”
At no time is this more apparent than in the case of active massive “random” violence.
Not long ago, the dedicated, experienced volunteers of ICSAVE, Integrated Community Solutions to Active Violence Events, were teaching movement to Rescue Taskforce teams comprised of law enforcers and EMS personnel from various agencies, state, local, and federal. ICSAVE teaches Public Safety Integration classes like that several times a year.
A Rescue Taskforce, or RTF, is EMS with LE escorts. RTFs move into the “warm zone,” after contact teams have chased an active killer into another area.
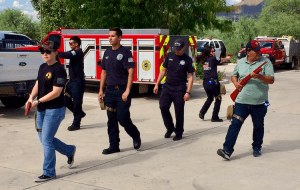
Medics stand by while the officers escorting their RTF discuss their next move in a simulated warm zone. Image from training we (ICSAVE) did for firefighters and LEOs in Rio Rico, AZ
The area within range of the active killer is called the “hot zone.” “Cold zones” are where the ambulances are staging, out of sight and out of range. Warm zones are somewhere in between. Of course, warm zones can turn hot on a dime.
We were discussing Danger Area Crossings, a type of Bounding Overwatch. A few of my fellow instructors–very knowledgable officers with years of SWAT and / or military experience–disagreed almost violently with what I was teaching.
“We haven’t taught Bounding Overwatch in years,” one of them said. Instead, they insisted that the team move between buildings no faster than the gun-toters on the taskforce could return effective fire while moving. “You never want to be off your [firing] platform,” they said.
There was some validity to their arguments. Being able to return effective fire is not a bad thing. Unless, of course, you get shot while doing it.
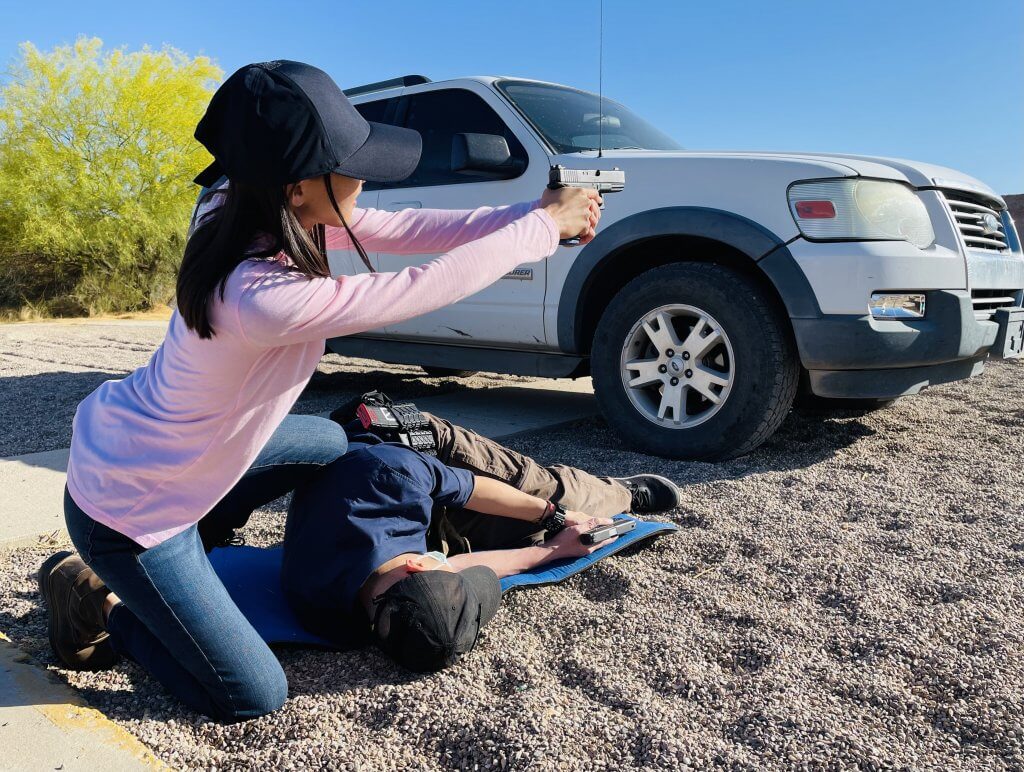
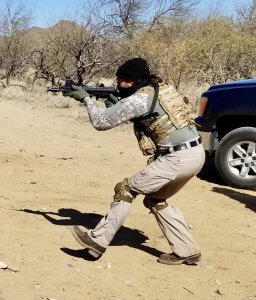
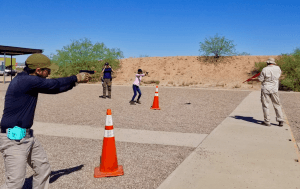
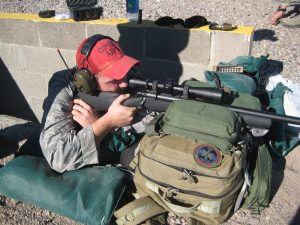
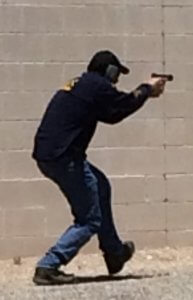
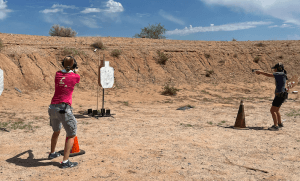
There is a time and a place for “staying on your platform and returning effective fire,” as this student of mine is practicing. When you’re trying to cross 40 meters of open terrain under fire is not one of them. Go around if you can. If you can’t, move your behind and let your overwatch return fire.
And I certainly resembled the implication that some of the methods I was espousing are not brand new.
But just because something is old doesn’t necessarily make it a bad idea. The wheel, for example, is not brand-new. It’s still a good idea.
Omaha Beach was not taken by a SWAT team serving a warrant. Those who lived moved their asses from the surf to the seawall, in bounds. Ask yourself this: if you’re caught up in a complex coordinated attack by multiples with rifles, say, on the other side of the food court in a mall, what will serve you best? Infantry tactics? or Warrant Service tactics?
Will the methods you need be closer to those used by troops in contact? Or to search techniques used by special agents looking for crooks hiding in closets?
To be fair, the venue we were using to train was not exactly the wide-open spaces I was trying to train the students for. I was talking about crossing soccer fields, but in the place we were training, the distance between buildings was relatively close, well within effective pistol range, even while moving.
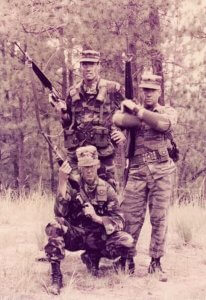
TLD cadre, Jack’s Valley, CO, 1983
And it’s also true that I’m no spring chicken. The first time I taught tactical movement was on the Tactical Leadership Decisions course in Jack’s Valley in 1983. Dang–was that really 40 years ago?
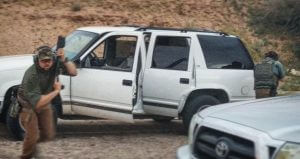
And then there was the time almost a quarter of a century ago when my partner Ed K, K9 handler Dan D, a deputy named Cody, and I were running down a road that bullets had just bounced off of. Our friends were in trouble and we weren’t close enough to help, so we ran over there from about 70 meters away (it looked much, much farther to me at the time). The bad guy was mowing down our friends with a rifle, and they were shooting back with pistols. I had a rifle, but he was on the other side of some vehicles, and I could not see him from where we’d been at.
Ed had a shotgun that he couldn’t use so far away, without endangering our friends.
So we just ran over there, as fast as we could.
There was no bounding overwatch.
No formation.
No 3 to 5 second, “I’m up, he sees me, I’m down” rushes.
We just ran.
As we ran, I remember thinking, “This is stupid. We’re not doing 3 to 5 second rushes. Any second now, I’m going to get locked out.” Locked out was a term we had used in the military to indicate getting shot during a MILES training exercise. If you were, you had to take the key out of the laser transmitter on your weapon (locking you out of it) and insert it in your MILES harness to stop the irritating squeal it produced when somebody hit you with their laser. I’d been shot at so many times with lasers over the years before that, my mind defaulted to laser terminology as I was evaluating the folly of our methods under actual fire.
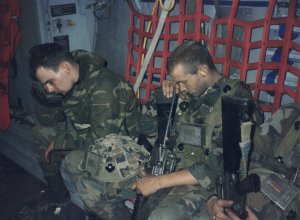
Dog-tired soldiers we aeromedically evacuated as “walking wounded” during a JRTC exercise at Ft Polk, LA. Note the dark, cross-shaped domes of the MILES (Multiple Integrated Laser Engagement System) receptors on the helmet and suspenders.
So I had some limited experience upon which to base my opinions about how to cross open ground under fire.
Not taking a thing from those fellow instructors, who like I said were very knowledgeable and experienced and for whose character and intentions I had the utmost respect, and still do. Just be wary whenever a trainer uses words like “always” or “never.”
The best tactics trainer I ever met–and I have learned from some outstanding military / LE trainers, including those guys who disagreed with what I was teaching to those RTFs–told us that
“Good tactics are tactics that work. What works well in one situation may not work in another.”
SMSgt (then MSgt) Ferguson, the finest tactics coach I ever had, stands by the front wheel of the Deuce and a Half, with some of the finest small unit tacticians I ever worked with, FE Warren’s Olympic Arena team
Target Audience
If I’m going to pass on anything meaningful to you in this article, I suppose we should first discuss who “you” are, and different situations in which you might move to contact.
This article is for anybody who may be moving to, or through, a danger zone, in anticipation of possible contact with a hostile enemy.
Before you think, “That’s not me,” think again.
You may be a civilian moving through a danger zone in order to get away from, say, a civil disturbance. That type of movement is sometimes called Escape and Evasion, or E&E.
You may not be on the FBI HRT–Hostage Rescue Team–but regardless of your day job, you will be THE on-scene HRT if you hear glass breaking in your young daughter’s room, you hear her whimper “Leave me alone! Get out of here!” and he replies “Shut up, b__ch, or I’ll cut you!”
Would you really avoid movement to contact in that situation? Or would you move to a confrontation with that enemy, ASAP?
Types of Movement
Broadly, tactical movement falls into one of two categories:
Proactive, and
Defensive / Reactive
Most–indeed, just about all–fights begin as ambushes. Unless you are on a capture or kill operation overseas, or serving a no-knock, high-risk warrant stateside, you are probably not the ambusher, at least not at first. Good guys and gals tend to be the ambushees.
So almost always, your initial movement “off the X,” or perhaps more appropriately, “off the railroad tracks of his assault” will be defensive and reactive in nature.
Getting off the “X”
Your main goal when defensive / reactive is to stay alive long enough to get your pistol out and return fire. After you do, you and your corresponding movement may switch to proactive or offensive mode, to take the fight back to him before he can catch up with your initial, explosive movement off the X.
The V to L and the Deadly Diamond are foundational types of reactive movement off the X, which then set us up for a riposte, or counter-attack.
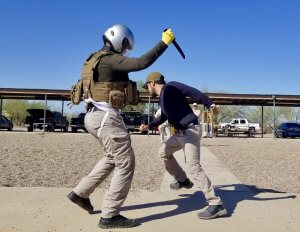
Defenders in the blue and pink shirts practice getting a simulated bad guy (tan shirt) in an L
There is a more proactive (or less reactive) use for the V to L and the Deadly Diamond. Later on in this article we will introduce the usefulness of the V to L in Hostage Rescue. We discuss it in much greater detail in a separate article, Hostage Rescue in the Home.
Proactive movement includes, but is not limited to:
Patrolling
Press to threat
Clearing ops
Purges
Clearing rooms and buildings is beyond the scope of this article. I mention it here to contrast it with a Purge. A Purge is checking your house or apartment when you come home, to make sure you are alone, before locking your EDC in the safe. You are not anticipating contact with a burglar–if you were, I pray you would have enough sense to not go in, and to call the cops–but you are not stumbling around blindly, either. Let each opened door, like a recently opened bottle of fine wine, “breathe” for just a bit before you blunder across the threshold. Maximize your distance from corners, just the same. Don’t stumble blindly into anything.
We will focus here, instead, on Patrolling and Pressing to the Threat.
Patrolling
Patrolling is looking for trouble, or trouble spots.
A rancher who rides her property line checking the fences is, in essence, patrolling. The trouble she finds may be more bovine or civil engineering related than hostile–unless she raises bison, which in my limited experience (we had a small herd at Glendo State Park) are very ornery animals–but she is patrolling nonetheless. Along the southwest border, where I spent a considerable portion of my adult life, a rancher should also be prepared to encounter two-legged predators.
Out west, where the wildlife is still free-ranging, and not born, living and dying within a quarter mile of a feeder, stalking while hunting birds or beasts is a form of patrolling.
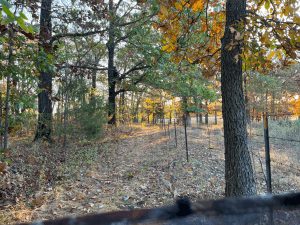
Hunting from a blind or a tree stand requires noise discipline, and oft-times resilient tolerance of temperature extremes, just like manning an LP / OP (listening post / observation post) in the military does, but it is not patrolling. Stalking animals while hunting is a civilian form of patrolling.
Escape and Evasion
E&E is a type of foot patrol.
If you and your date are eating dinner at a nice restaurant in the arts district when idiots outside disagree with the outcome of a collegiate sporting event and begin breaking glass & setting things on fire–I wish this was a hypothetical, but stranger things have happened–you might ask for the check and book it back to your car.
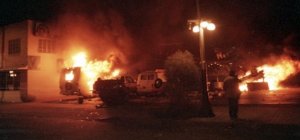
In this photo from the Arizona Daily Wildcat, taken by Randy Metcalf, drunk idiots who are mad about the outcome of a basketball game–a basketball game!–have set fire to an RV and several cars on Tucson’s 4th Avenue on 02 Apr 2001.
As you pass through an area filled with some crazies, and a few hostiles, you might have your hand on the butt of your holstered pistol. If things are crazy enough, your might even have your gun out.
Your date may have his or her hand hooked in the back of your belt, looking behind you to warn you of impending threats, as you will be bypassing potential danger areas. If they are a really awesome date, they’ll have their own pistol.
This two person arrangement is one very rudimentary type of “patrol formation.”
Antelope drill in a Heloderm VLTA, very large target array.
Patrol Formations
Formations have been part of movement to contact since men fought with spears, using their shields to protect the comrades to their left. In about 835 BC, the prophet Joel compared locusts to an advancing army:
They march straight ahead. They do not leave their places. They do not crowd one another. They keep in their own lines. Even when they break through the defenses, they do not break their ranks.
–Joel 2:7b-8 (God’s Word translation)
For some practical and some traditional, almost spiritual reasons, formations are an unquestioned, “given” part martial culture.
Most patrol training involves maintaining some sort of formation in order to be able to return effective fire on a moment’s notice.
Formations get a lot of attention in tactics classes. Formations can be useful, but the main reason they are taught is because formations are not hard to teach. Formations don’t take a lot of imagination to come up with a lesson plan. There are very few logistical requirements to teach a formations class. Formations are easy to learn and easy to practice, even though many trainers consider formation work “advanced tactical” training.
When you are advanced enough in your understanding of formations, you will realize that
one size does not fit all, and
we need to adopt our formation to the environment, flowing seamlessly from one to another “like water filling a vessel.”
Diamond formations, for example, work great in theory when you are looking for an active killer. Diamond formations (Point, Tailgunner, Wingmen on each side) are pretty good in wide hallways or narrow streets with doors, hallways, and alleys on either side. However, responders to the Navy Yard shooting reported afterward that the diamond they had rigidly practiced as their one and only formation was basically useless in the narrow confines of the cubicle farms they had to clear.
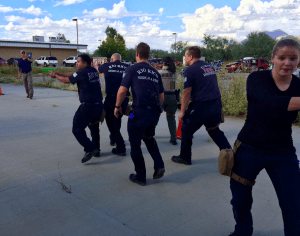
Practicing a diamond formation escorting two EMS personnel in a RTF. In real life, RTFs may need to be escorted by only one or two cops, depending on resources. Most if not all of the “cops” pictured here are actually firefighters doing “role reversal” Public Safety Integration training.
And I have to snigger when I see SWAT students covering a hundred meters of open ground in between their bread truck and the target building in a slow moving, “nuts to butts” Stack that was designed for the inside of a hallway.
“Traditional tactics learned and used to combat an active shooter inside a structure are ineffective and unsound when confronting an adversary in an exterior, open environment.”
–Blair, Burns, Curnutt and Nichols, Active Shooter Events and Response, p. 30
The Fairchild AFB hospital attacker and the Fort Hood Soldier Processing Center traitor both went mobile outdoors after shooting up interior spaces. Likewise with the ABB Plant shooter in St Louis.
“I want to see plenty of beach between men. Five men is a juicy target; one man is a waste of ammo.”
–“Tech Sergeant Horvath,” in Saving Private Ryan
When patrolling with several friends in the open, the Wedge you may have learned in Army basic training works better than a stack, or any close bunching up. Maintain 5 or 10 meters between people.
But even the classic Wedge has its drawbacks.
In theory, those on the right side of the Wedge should carry their guns left handed, so their muzzles cover to the right. At RECONDO (LRRP) school in the early ’80s, our instructors, most of whom had MAC-V or 5th Special Forces patches on their right sleeves, told us that in ‘Nam, as soon as the first shots were fired, all the right handed folks on the right side of the formation immediately switched back to right handed holds before returning fire. The policy designed to reduce response times effectively extended them. One lesson there: if you have lefties in your unit, put them on the right side of your wedge.
Students practice the Wedge in a Tactical Emergency Casualty Care class ICSAVE taught to BorSTAR, BorTac, Patrol agents, and ANG personnel.
In addition, the inverted V-shaped Wedge formation ceased to exist within seconds of contact, as everybody with any sense went to ground or sprinted for the nearest cover.
One variation of the Diamond, if you are moving to contact in a wider hallway, anticipating contact ahead of you, and there are few or no danger areas off to the sides (like open doorways or side hallways) is a T formation. Basically, the wings or sides of the Diamond move up till they are on line presenting a united front ahead of them.
Practicing a three-abreast T formation RTF, escorting two EMS personnel. This one actually had two “tail gunners” watching their 6 o’clock (one is off camera to the right). Most of the students in this class were firefighters, so we had them playing the roles of law enforcement as well. In reality, 5 escorts of a 2xEMS RTF is pretty heavy on the LE side. Until our society considers LE an honorable profession again, you are likely to be short handed with the LE component of your RTFs.
You might be in a column formation on a narrow trail, or a double column H formation working down both sides of a street or wadi / wash / arroyo, covering over the heads of those on the opposite side.
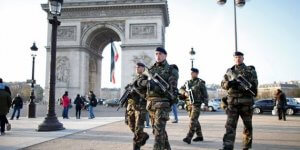
Recently in Strasbourg, France, seat of the European parliament, I saw two- and four person Sentinelle teams of French soldiers patrolling with FAMAS rifles. In response to the terror attacks of 2015, the French Army placed mobile vigipirate (pronounced “veegee peerot,” meaning vigilance against terrorism) foot patrols in crowded high-tourist concentration areas that have historically been juicy terrorist targets for IED, small arms, edged weapons, or vehicle ramming attacks. The soldiers I saw simply walked one behind the other in a Column formation, with about 10 meters between them. Our tour guide told us not to be concerned (I was LESS concerned, knowing they were there) and not to photograph them.
I know the difference between pros and mall cops ogling the skirts; those Sentinelle troops were SWITCHED ON. They were scanning the crowd, looking for threats, like they meant it.
In this image from huffingtonpost.fr, French soldiers are patrolling in a roughly diamond shaped formation. The ones I saw in Strasbourg were single file and spaced farther apart.
Regardless of whether your formation has two or 20 people, HAVE A PLAN for what you are going to do, should you make contact with the enemy.
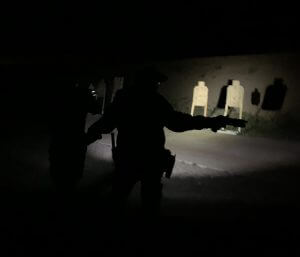
In our Heloderm Night Fighting courses, for example, we do a drill where our couple from the restaurant is E&Eing, but they begin to take fire.
Practicing two person E&E, live fire, at night.
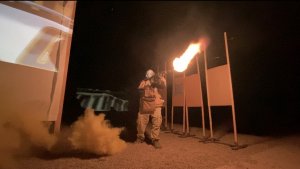
They fall back to break contact, rather than betraying their position in the dark with a flashlight or muzzle flashes. We do other drills where students return fire, but that one is about knowing what it’s like on the receiving end (we use an AK with blanks–and yes, we check to make sure they ARE blanks).
That Hollywood adapter puts out an impressive level of muzzle flash. Image from Heloderm theater shooting response training
DiGiacomo – Taylor drills
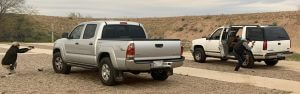
One of the most effective means of breaking contact is a two-person leap frog. While one returns fire, the other falls back to a position of cover. Say, for example, you are in a parking lot firing around each end of a car (I know, cars are more shielding or concealment than cover, but in a fight, you take what you can get).
One partner falls back to the next car behind them. They may or may not be inclined to yell “Moving!” to their partner, who might respond with “Move!” not as a command, but so everybody knows they got the message. When the first person to move is in position to return effective fire, whether or not they are shooting (one or two spare mags don’t last nearly as long in a real fight as they do on TV, or your six mags in a USPSA match; you must budget your ammo wisely), they might yell “Set!” or some such, to let their partner know they can move themselves.
The partner then yells “Moving!” (followed, ideally, by their partner yelling “Move!”) and falls back TWO cars, till they are at the car behind (beside) the partner who moved first. Thereafter, they always move two parking spaces, leap-frogging past each other. This also works in wooded environments, and potentially in a hallway, breezeway, or alley with vestibules.
As the partners get farther away, they either are successful in breaking contact, or the enemy is forced to pursue them. Moving thusly, I’ve seen pairs whittle down entire squads who were sent after them. Although the retrograde leap frog is nothing new, and pre-dated my experience by centuries (it was an SOP, standard operating procedure, of Rogers’ Rangers in the “French and Indian” War of 1754 – 1763), two guys I used to work with, named Jim DiGiacomo and Eric Taylor, (re-)”invented” this method for themselves without having been taught it. When I teach it, I name it after them. When they were our OpFor aggressors, they laid waste to my entire team on more than one occasion during MILES exercises, by sucking us into pursuing their retrograde leapfrog across whatever ground lay between us.
If you are obliged to retreat, let the front of your whole party fire and fall back, till the rear hath done the same, making for the best ground you can; by this means you will oblige the enemy to pursue you, if they do it at all, in the face of a constant fire.
–Major Robert Rogers’ 8th Rule (out of 28 Rules) of Ranging
NOTES FOR SAFELY PRACTICING DIGIACOMO – TAYLOR:
Retrograde leapfrogs can be practiced safely with Airsoft, blanks, or FX type marking cartridges. They can actually be practiced safely live fire, if certain precautions are taken. As in the photo above, you can park cars adjacent to each other, as if in every other space in a parking lot. Place one target for each participant, far enough to the outside that they are not tempted to “shave” a car firing at it. The risk that needs to be managed most comes when they round the car they are falling back to and pivot into a kneeling firing position; there is potential there for “lasering” their partner with their muzzle, even if it’s through the vehicle. “Sabrina” or “Temple Indexed” type holds, while otherwise silly, can prevent Rule 2 (“I will keep my muzzle pointed in a safe direction“) issues when practicing this skillset.
Pressing to the Threat
The classic “Press the Threat” situation is when you are hunting an active killer. I have also used it in certain warrant-service situations, where we were concerned that a Chester had a “kill switch” for deleting his child porn so it could not be used against him in court; we had to beat him to that switch.
Bounding Overwatch
. . . is also a way to press the threat. Bounding Overwatch is the proactive, “Offensive” if you will, version of DiGiacomo – Taylor.
When contact with enemies is possible but not anticipated, you simply patrol, like the Sentinelle troops mentioned above.
When contact is more likely, you might divide your team into two or more subsets; for example a squad breaking into fire teams. One element stays put in a position where they can watch a wide area and cover it with fire if necessary. The other team moves past them, then sets up an overwatch position where they can cover the other team’s movement. The first overwatching team hands off the covering responsibilities to the first moving team, then moves past them, and so on, in a leap frogging manner. Like DiGiacomo – Taylor, only instead of retrograde breaking contact, you are moving forward to possible contact in an area that has not previously been cleared.
Sniper Overwatch
If you are fortunate to have sniper or designated marksman support, they might hang back in a controlled area with a spotter using binoculars and a rifle with a magnified optic to overwatch your teams’ movement. Snipers displace (move) as necessary, but generally they provide stationary, as opposed to bounding, overwatch.
Patrol rifles (usually, but not always, AR-series carbines) are great tools. Their advantages include:
Capable of greater magazine capacity than your average handgun. I say “capable” because you could have a 5 round mag in it, even though standard mag capacity for the AR system is 30. As Clint Smith explained in our Urban Rifle course, more ammo in the gun means you can be plugged into the fight more, and manipulating the weapon (out of the fight) less.
More powerful cartridges, which means you’ll probably need to shoot less. In my limited experience, people shot with rifle bullets fall down after 1 or 2 shots. People shot with pistol bullets must be shot again, and again, over and over till they fall down and stop killing people. Using a more powerful rifle cartridge translates to fewer bullets flying through the neighborhood endangering bystanders. Police in Watertown, Mass, flung 300+ pistol bullets horizontally into a neighborhood fighting the Boston Marathon bombers, mostly from well outside effective pistol range–but well within effective rifle range.
Four points of contact with the weapon, providing a more stable, potentially more accurate weapons system.
Zero magnification, near-zero parallax, “red dot” optics (with reticles which may or may not be red) are best for most social work with a patrol rifle, which occurs at conversational distances or at farthest from a few car lengths away.
However, a patrol rifle with a zero magnification optic is NOT a sniper rifle. A rifle used in overwatch mode SHOULD HAVE A MAGNIFIED OPTIC so you can know exactly what is going on downrange. Johnny Hurley was mistakenly killed by an officer with a patrol rifle a block or two away (see below). Another officer with a patrol rifle nearly shot the wrong guy outside Robb Elementary in Uvalde, and probably would have, but for the officer’s self-control and fire discipline. Rifles are awesome fight stopping tools, but discernment about when and against whom to use them is a (perhaps even the) key component of their effectiveness.
The US M24 sniper rifle, suitable (in trained hands) for overwatch of movement to contact
The “civilian” version of bounding overwatch might have two people moving forward, one at a time. It’s not very likely that you will ever be caught up in a lone wolf active killer, much less a complex coordinated, attack such as the November 2015 attack in Paris or the November 2008 attacks in Mumbai (although we will certainly see more of those in the USA). It’s even less likely, if you are a responsibly armed citizen, or even a trio of armed plain clothes criminal investigators at lunch, that you will have a friend nearby with a scoped rifle handy in her or his trunk.
If you are fortunate to be blessed with such a force multiplier, while you are unfortunate enough to be cursed with being near a mass killing event, it’s probably a good idea for your designated marksman to only move with you till you are near the hot zone, then to find someplace high they can watch over you from.
See ASR Rifles and ASR Med Kits for more info about the role of magnified optic long guns in stopping active killers.
Danger Area Crossings
Some patrols, like the French troops of Operation Sentinelle, are meant to be seen. Their raison d’être is to be a visible deterrent. The same can be said for any on-duty security guard, or uniformed police officer on a walking beat.
Reconnaissance patrols through potentially hostile territory, and escape / evasion movement, work best when unseen. In the bad olde days before IR, thermal imagers, and UAVs became readily available to anybody with an Amazon account, things like trees, riparian areas, folds in the terrain, and urban alleys enabled concealed movement. Sooner or later though, even then, you were bound to come across an exposed, open area. With a forest meadow, you could simply move through the trees around it. Never be afraid to walk farther if it provides better concealment or cover. With a road, though, you were probably going to have to cross at some point.
Ideally, you cross between two road bends so you can’t be seen from well down the road.
A Danger Area Crossing is just an extreme form of Bounding Overwatch. You set up security looking each way down the road. The rest of your troops form some sort of defensive perimeter on your side of the road. You send two troops across. They move fast. How fast must be balanced against any need for noise discipline (especially at night), but they minimize the time they are exposed in the open (“danger”) area as much as possible.
Once the first sacrificial lambs reach the other side, they scout around a bit. If they don’t run into any problems, one provides security while the other signals for two more to cross. And then two more, and so on, until the entire unit has crossed.
It almost goes without saying, except that it’s the whole idea of a Danger Area Crossing: if the first two take fire halfway across the road, don’t send any more people that way.
This photo shows the ultimate Danger Area Crossing: the Rohrbach or “Lower” bridge over Antietam Creek, from the west side. It’s better known as “Burnside’s Bridge,” because for over three hours on 17 Sep 1862, the bloodiest single day in American military history, Union General Ambrose Burnside kept trying to send men across it from the east side (the far side in this photo). They kept getting mown down by Confederates from Georgia who occupied the higher ground on the west side (the hill where I took this photo in 2022). Burnside forgot (or never learned) the Number One Rule of Danger Area Crossings, which again is that,
If the first troops across take fire, go a different way.
Fewer than 500 Rebels held off the entire Union 9th Corps here. Col Henry Benning, who commanded the Confederates guarding the bridge (and for whom Ft Benning in Georgia was until recently named), recalled that the Union soldiers on and near the bridge “lay in heaps.”
Some of Antietam Creek was only waist deep–knee or even ankle deep in spots. Union General Isaac P. Rodman took a division downstream and around a few creek bends, wading the Antietam at Snavely Ford. Rodman’s flanking attack, coinciding with a gallant rush on the bridge by both the 51st New York and the 51st Pennsylvania Infantry Regiments, finally took the bridge, and drove the Rebels off the hills to the west of it. In Burnside’s defense, it was he who had ordered Rodman to go around. But he wasted a lot of fine infantry with his three direct fontal assaults across that bridge.
Danger Area Crossings, when properly executed (NOT like at Burnside’s Bridge), are clearly valid techniques in combat zones. How might they apply to you?
One possible use for the Danger Area Crossing might be if you are unarmed and trying to get your students out one side of a school that is not defensible (some school buildings are glass “fish bowls”) when there is an active shooter on the other side of the campus. If the first TA you send across doesn’t get shot, it might be safe to send your kids, two at a time, to them on the other side of the playground by a trail that leads to a creek or some other covered escape route. But this article is mostly about proactive movement to contact.
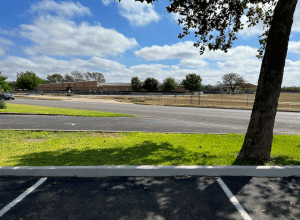
One thing the responding officers did RIGHT at Robb Elementary in Uvalde, TX was evacuating students out of the other classrooms through the windows during the protracted standoff in the hall. Many fled across this school yard and were sheltered at the funeral home off camera to the left. I took this photo from about where the funeral home employees who attempted to save what they thought was an innocent accident victim first started taking rifle fire, five minutes before the killer entered the school through an unlocked door.
As mentioned above, one type of Stateside movement to contact is seeking out an active shooter. When you have “stimulus,” you simply run pell-mell, or in a bounding assault (see below), till you can get him in your sights. You bypass potential danger areas as if they are not there.
When you lose the stimulus (you don’t hear any more shots or screams), you slow down into a methodical search, not bypassing any door or hidey-hole that might conceal the bad guy, till after you have cleared it. It’s noteworthy that the students at Robb Elementary had been trained to be very quiet in active killer situations. Almost all of those in the classrooms that had been attacked were dead or at best unconscious, so responding police had no “stimulus” to seek during almost all of the armed standoff. Since you can only focus on one thing at a time, we look for (and if seen, at) things in the following priority:
People. People can hurt you. If you don’t see any people, look for
Open doors or alleyways. They can hide threats in the “deep corners.” If none, pay attention to
Dead space (areas behind things that you can’t see through or around), and lastly
Closed doors
If you hear shots / screams again, you pick up the pace again and give only passing notice to potential dangers on your flanks.
When you are fairly certain that a bad guy is in a given building, but there is considerable open space (like a wide practice field or terrazzo) between you and that building, and you do not have any active stimulus (the bad guy is not firing, and victims are not screaming, right now), you might consider doing danger area crossings till you get to the building.
If the bad guy steps out onto a balcony and shoots down at you while you are the ones crossing in the open, DO NOT STOP, SLOW DOWN, OR PAUSE TO RETURN FIRE. As the fighter pilots say,
SPEED IS LIFE.
Let your overwatch return fire, which will be far more accurate than any you can muster while dancing the Beirut two-step under fire. MOVE YOUR A$$ out of the KZ (kill zone) of the ambush.
When I was a young man, my dad got a periodical from the USAF Fighter Weapons School (USAF equivalent of the Navy’s Top Gun). It had tips and tricks, say, for using clouds to your advantage. There was an artists’ rendition of Matt Dillon in Gunsmoke, shooting at a bad guy on a horse who was shooting back at him. Festus was running out with a shotgun. The caption read:
Have no pride when it comes time to GET OUT OF DODGE.
(That would be Dodge City, Kansas, for those of you unfamiliar with Western lore.)
If you are caught in the open, remember Winston Churchill’s words:
“When you’re going through hell, keep going.”
Again, move fast. Once you get out of his KZ, say underneath a balcony and out of his line of fire, THEN you can formulate a plan to go get that guy. But first you have to arrive alive.
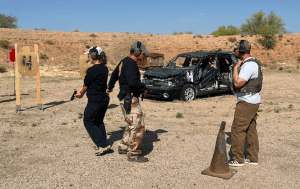
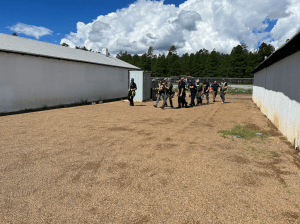
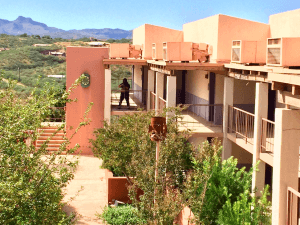
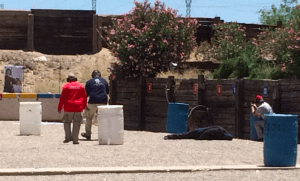
If you’re crossing the courtyard (most of which is off camera to the left of this photo) when a payaso steps out and starts shooting, do NOT stand there in the open and trade bullets with him. Let your overwatch return fire while you pick up the pace and sprint to cover. Ideally, you get at least part your team into the building with him. Then your overwatch can keep him pinned, while you formulate and execute a plan to hunt him down.
Although the common sense of this team approach to getting shot at in the open, or danger areas in general, should be obvious, it sits very poorly with some of the cops I’ve trained. When shot at, their programmed response is to shoot back. They want to slow to a “Groucho walk”–or worse yet, stop and stand flat footed–to return fire. Which may help you put holes in cardboard targets on a square, flat, one-way firing range, but can get you killed in the real world.
The “Groucho” walk, intended to reduce bounce (and hence, muzzle dip). Heel, toe, heel, toe.
As I mentioned toward the beginning of this article, I was teaching Bounding Overwatch and Danger Area Crossings in a Movement to Contact class for public safety professionals (part of a larger ICSAVE Public Safety Integration / Rescue Taskforce / Tactical Emergency Casualty Care course) when some of my co-instructors (not coincidentally, SWAT types) practically revolted. “We haven’t taught bounding overwatch in years,” some said. “Never, EVER move faster than you can return effective fire.”
These SWAT guys wanted to teach responders to move in a Stack out in the open. When all you have is a hammer, everything must be a nail. I was outvoted, so I bowed out gracefully and surrendered control of the class to those mostly younger, better, and brighter instructors. More on that in a minute.
Bounding Assault
Once contact is made, breaking contact (see DiGiacomo – Taylor) may not be an option.
Like the cops in the hallway of Robb Elementary at Uvalde, storming the position where the enemy lies in wait to ambush you may just be a “s__t sandwich” you simply have to eat if you are to stop the dying (in other words, rescue the wounded; it was already too late to stop the killing before they got there).
Unless we were serving a warrant on a child molester (those guys have nothing to lose by shooting it out), our criminal investigators might have been just as likely to get into a gunfight in the food court at the mall over lunch as during planned enforcement actions. I trained our special agents to close the distance, if necessary, by moving in bounds–with the caveat that
“Distance favors the trained marksman.”
That mantra I first heard at Gunsite means that a well-aimed bullet will ALWAYS run faster across the distance between you and the bad guy than you can run on your feet, and it will expose you to danger less.
But my own limited experience has been that, even if you have a long gun, you might need to get closer to positively ID the threat or to get a clear line of fire. This is not something I read about in some “Guns ‘n’ Babes” type magazine for wannabe SWAT guys, or saw on some keyboard commando’s YouTube video; I lived it. If you are armed only with your EDC pistol and the bad guy is halfway down the mall, you’ll simply have to get closer, even if (or perhaps especially if) the bad guy has a “reach out and touch someone” weapon like a rifle.
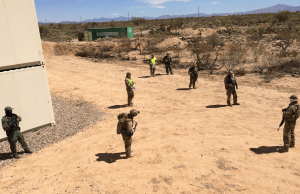
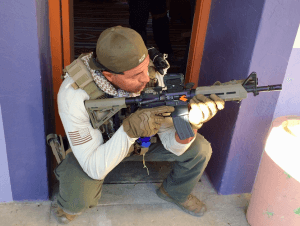
Teaching special agents to close with an active shooter by bounds
To recap, don’t close the distance unless you have to. If you DO have to, and there are two or more of you, you could assault by bounds.
One can work up one side of the mall while the other works up the other side, leapfrogging past each other, till you get him within the effective range of your weapons systems. The same concept works in a hall where there are vestibules for the doorways (as at Robb Elementary), although most interior walls won’t stop bullets.
The tighter confines of a hallway (as opposed bouncing between stores in the wider passageways of a shopping mall) make for a tighter concentration of fire you’ll be running into.
CAUTION: Running around in plain clothes with a gun out at an active shooter situation is a great way to get smoked by the good guys, as Johnny Hurley found out the hard way. Hurley was a responsibly armed citizen who stopped a cop killer on a shooting spree–and then was smoked by a responding police officer, on 21 June 2021.
Johnny Hurley. Photo from CBS Denver
However, in the few minutes between an active shooter launching his assault and the inevitable overwhelming police response, you probably have a moral obligation to put him down if you have the training and the means. After he’s out of action, and you hear sirens approaching, put your heater away ASAP. If you hear the footfalls and “Police!” calls of uniforms approaching, DROP IT LIKE IT’S ON FIRE. PUT YOUR HANDS UP AND OUT WITH YOUR FINGERS SPREAD APART.
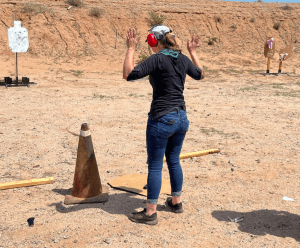
This range drill ended with an audible stimulus: a police siren. She put her pistol on the cardboard and stepped back with her hands up, fingers spread.
Do EXACTLY what the cops tell you to do–no more, no less–WHEN they tell you. It’s OK to communicate “I’m a good guy! I’m a good guy!” You can yell “HE’s the bad guy!” but DO NOT POINT, even with an empty hand.
When Left to Their Own Devices . . .
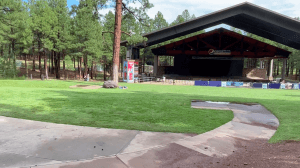
The capstone exercise to that ICSAVE Public Safety Integration class–the one where the other instructors insisted one should never move faster than one can return effective fire–was a Complex, Coordinated Attack (multiple destructive means, multiple assailants) in an open, “Hollywood Bowl” type amphitheater. Following a simulated vehicle ramming attack, two bad guy role players were running about on either side of the stage with long guns firing blanks, while moulaged “victims” lay about.
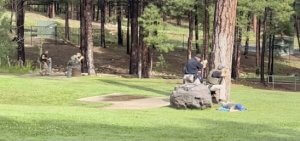
This area is much larger than this photo makes it appear. The trunk of the tree by the boulder is about four feet wide. Note tiny “active shooter” to (your) left of the stage and the right of the red and blue box. You may need to magnify this image to see him. The person laying down next to the boulder by the tree, and people to the left of that, may also give you some idea of the scale.
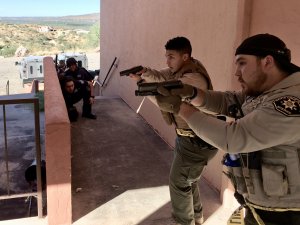
I was mildly amused, and felt somewhat vindicated (though I didn’t say “I told you so”), when the LE students on the contact team, who had to re-take the amphitheater across the open, instinctively resorted to leap frog, bounding sprints to close to within effective ID and engagement range of the bad guys. The whole time, they were yelling “cover us while we move!” and such. That TTP simply works–or should I say, gets fewer of your people shot than other TTPs, like moving slowly in a Stack–when you must assault across broad, open terrain.
Officers on the right take up an overwatch position behind the tree by the boulder, while officers on the left bound forward.
I didn’t bring it up, but to his credit, one of the instructors who had “revolted” against my “outdated” TTPs apologized after he saw how effective (and intuitively obvious) assaulting by bounds across a danger area still is.
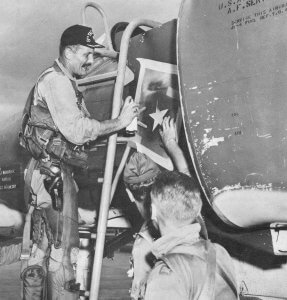
The main takeaway from Top Gun Maverick?
Sometimes, old guys know stuff.
Robin Olds, who had been an ace in WWII, was an old man by the time he led the 8th Tac Fighter Wing–“the Wolfpack”–over Vietnam. He taught those young Air Scouts how to kill MiGs. Iconic USAF photo via Squadron / Signal Publications
2 Cents (Only) on Movement in Hostage Rescue
Specifics of Hostage Rescue, like Room Clearing, are beyond the scope of this article. I bring it up here because if done properly, it involves proactive movement to contact.
There is absolutely a time and place for “staying on your platform” and for moving no faster than you can return effective fire.
The V to L is a foundational technique which is indispensable when working with a partner in hostage rescue. When a bad guy is trying to kidnap you daughter, you and you partner move–slowly but inexorably, deliberately, “staying on your platform”–along forward obliques till you have him in an L. That is NOT the time to be running faster than you can return effective fire.
You might need to run, as Albuquerque PD SWAT Sniper Steve Rodriguez did through half a mile of snarled traffic on the I-40 bridge over the Rio Grande, to get within range of a hostage taker (in that case, it was a man threatening to toss a toddler off the bridge). But once you are in range, slow down. When you reach a position of advantage, stop and get the most stable shooting platform available. Steve was armed with a scoped rifle (a Winchester Model 70, if I recall correctly).
With a partner, when you are armed with handguns, you are moving to different (but not opposite) sides of the hostage taker, to attain a position of advantage, specifically, to get him in about a 90 degree angle between you, so you have no shoot-through issues.
The “hostage taker” in this drill is the cardboard target behind the white painted steel “hostage”
His human shield cannot protect him from more than one direction at once. IF you cannot convince him to leave without her (they’ll catch him later), and IF you have confidence in your abilities, one of you might be in a position to take the shot.
Those are big IFs.
There is a time and a place for it. I know those who have done so successfully. For example, when the I-40 hostage taker’s arms got tired of holding the toddler over the railing, he would occasionally bring the kid in to rest his arms. After only about 90 seconds of watching the bad guy through his scope, Steve took advantage of one such lull to cap the bad guy while the kid was over pavement. The child dropped onto the sidewalk, but it beat taking a 5+ story dive into the Rio Grande.
Steve Rodriguez now shares his considerable SWAT / sniper experience as an instructor at Thunder Ranch. Here Steve coaches a shooter in the Old Rifle course.
The following year, Steve dropped a hostage taker who had a gun and an (alleged) bomb in front of a bank, with a head shot (which merits its own story). But Steve Rodriguez was a sniper’s sniper, a trained professional with ice water in his veins. “Don’t try this at home, kids.” Shooting a hostage taker is fraught with hazards, especially for the hostage.
Movement to a position of advantage can give you an edge, and a wider slice of the bad guy’s melon to shoot at.
The only other thing I’ll mention here about Hostage Rescue is that you should NEVER, EVER give up your gun. That only works on TV. In the real world, 99.9% of the time, when a well-meaning cop gives his or her gun to the hostage taker, they get shot with their own gun. The hostage is more likely to be killed as well. Hostage Rescue in the Home goes into much greater detail on the subject.
3 to 5 Second Rushes
“I’m up, he sees me, I’m down” is a standard part of military assaulting by bounds, but it is not always a good idea, especially in urban environments. At least not prone to prone.
The classic three to five second rush starts from prone (on your belly). You stand up, run for a few seconds, and plop back down on your belly, IDEALLY ROLLING AWAY FROM WHERE YOU WENT DOWN (an oft-forgotten aspect of the three-to-five-second rush).
Upsides of I’m Up He Sees Me I’m Down
Standing up, sprinting for a bit, then plopping down on your belly is supposed to keep you from getting shot (as often or as centrally) because it takes a few seconds for your enemy to put you under his sights once he sees you. It works best in open, rural terrain where there is low cover such as fallen logs. Also, dirt may catch and absorb bullets. Bullets “bouncing” off of dirt (it happens) tend to bounce higher than bullets bouncing off of hard surfaces, so being lower may keep you under ricochets.
Downsides of I’m Up He Sees Me I’m Down
Even in rural terrain, though, going prone does NOT always work. My friend Mike R went prone on a road when taking fire, just like they taught him in the Marines, and he was very nearly killed by near-misses. If Mike had it to do over again, he’d have stayed on his feet and sprinted into a nearby corn field. The speed of his movement and the concealment of the corn both would have made it harder to hit him. As it was, bullets bounced all around Mike and it was only by the grace of God that he survived (that happened on his birthday; now on the anniversary of his gunfight we tell Mike “Happy RE-birthday,” since every day he’s had since then is a bonus).
The three to five second rush was intended for people assaulting from hundreds of meters away. It was never intended to work at 20 or 30 meters, which is about where Mike was. As infantry got closer to, say, an enemy pillbox, they could crawl the remaining distance in the dead space where the design of the pillbox or armored vehicle they were assaulting did not permit the enemy to depress their guns from the firing ports far enough to hit them.
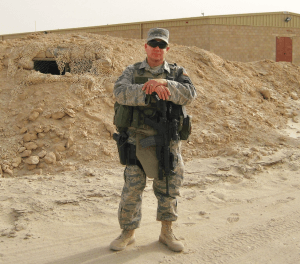
A bunker outside our barracks at Ali al Salem. If you were trying to take (or recapture) this bunker, and you could get onto the dead space of that dirt pile to the right (behind my left elbow), it would be difficult for folks inside the bunker to target you through that firing / observation port (behind my right shoulder).
Once the assaulters were close enough, they could toss grenades into the pillbox or MG position (or jump in there as Sam Woodfill did in WWI, finishing the job with a pick axe–you can’t make this stuff up).
UNlike an enemy in a bunker, an active shooter on his feet can depress his muzzle down as far as he likes. That’s why Mike almost got killed. At Ft Hood’s Soldier Processing Center, GIs followed their training and tried to low-crawl out of the room. The traitor stood right over them and shot them in the back.
On hard surfaces–concrete, parking lot, aircraft tarmac, shopping mall–bullets don’t bounce like billiard balls. They tend to deform and then skip along parallel to, or at only a slight angle off of, the surface they hit, be it the ground or a concrete / brick wall. Going prone in the mall puts your torso in line with any bullets he snatches onto the deck between you.
Kneeling, squatting, or staying on you feet and moving from vertical cover (say, columns supporting the roof) to vertical cover (corners of hard walls) will probably work better than prone-to-prone in urban environments.
Indoors, don’t hug or slide down walls for several of the same ricochet reasons you should not go prone or low crawl on hard surfaces. Also, if you “slide” down a soft wall (like gypsum drywall) a bad guy on the other side of the wall can hear exactly where you are and shoot you through it.
Nuances of 3 to 5 second rushes
If you feel like going prone to prone will (or must) work in your environment, keep the following in mind:
Do NOT let your feet flip up into the air and wave around like the back of a rocking horse’s rails, right after you plop down on your belly. Unless you fight this tendency, it will tell the bad guy exactly where you are, and possibly get you shot in the foot, in the second or two your feet are waving around like a flag.
Do NOT stand up where you went down. Roll or low crawl to another location before you come back up. He will likely be keeping his sights on the spot where he last saw you.
Do NOT go prone if there are not enough folds in the terrain or vegetation to hide you when you’re on your belly. Believe me, you will want to hide under a single blade of grass, if that’s all you’ve got. But if he can still see you, it’s next to useless. Stay on your feet and MOVE if there’s no place to hide on the ground. RAPID MOVEMENT IS A FIELD-EXPEDIENT SUBSTITUTE FOR COVER (see The ABCDEs of Cover).
If you MUST, repeat MUST, go prone in the open, minimize your cross section to incoming fire by pointing your prone body directly at him and keeping your feet in close. This makes it harder to fire both rifles and pistols (see Rollover Prone below) but NOT GETTING SHOT IS MORE IMPORTANT IN THE SHORT TERM THAN HITTING YOUR ASSAILANT.
In the era of the “red dot” optic, it takes less time to put somebody under your sights. What was a 3 to 5 second rush in my day, the era of iron sights, is probably a 2 to 4 second rush now.
Prone-to-prone 3 to 5 second rushes are for the young, and only for the young who do a lot of mountain climbers and burpees. I’m not getting any taller, but as I age the ground is getting a lot farther away. This is a very physical skillset. Don’t count on doing this fast enough to keep you from getting shot if your last pushup happened in the previous decade.
Rollover Prone (Rifleman’s Prone) as a Firing Platform
As previously mentioned, your bullets can travel the distance between you and him a lot faster, and a lot safer, than you can. But you cannot miss him well enough or fast enough to win the fight. You must be able to connect, even at considerable distance, with your EDC pistol.
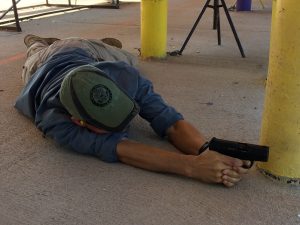
At Gunsite, they taught us what Jeff Cooper called “Rollover Prone” as a means of getting the pistol stable enough for a 50 – 100 meter shot.
It works, but it also presents a larger cross section of your torso to incoming fire. Try to shoot around cover if you can.
Also, in my experience, bracing your pistol against your palm, the side of which is braced against the ground, can change where you print on the target vertically. Try shooting at distance (say, 40 or 50 meters) off hand, and then from rollover prone, to see if you need to hold under or over to hit where you want to hit. Take several shots in each position, so you’re not basing your holdover or under on one or two “flyers.”
Note that in the photo above, his cheek is resting on his biceps as if his arm was a rifle stock. Jeff Cooper, who advocated this type of Prone, was a Marine, first and foremost a rifleman.
The shooting platform (“position”) pictured above is strictly an aid to marksmanship. It might be useful for overwatching a partner’s final movement to contact, or for “pistol sniping” at distance.
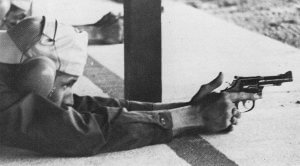
There are actually two types of Rollover Prone. The one pictured above would more accurately be called “Rifleman’s Prone” instead, even with pistols, as it is an attempt to replicate a rifleman’s standard prone, which is at a slight angle to the target (as opposed to a more “tactical” prone, the kind mentioned farther above, which has your head and feet in line with the target to reduce your cross section in relation to incoming fire, and you are NOT rolled up, even a little, onto your side).
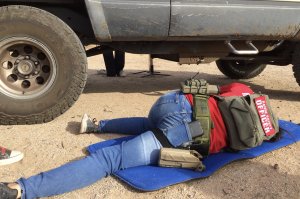
Rolling farther up on your side, with your body more perpendicular to the target, is also called Rollover Prone. With this second type you truly roll over, onto your side (or nearly so). It’s like you are standing up, shooting in front of you, only you have pivoted at the feet 90 degrees till you are lying on one side. This Rollover Prone is useful with carbine or pistol for shooting under things, say a car, during a hasty counter-ambush, and also at the top of stairs looking down a perpendicular hall.
Forward Obliques in Final Assault
Moving diagonally across a front filled with teams of Kentucky riflemen did not work out so well for the British in the Battle of New Orleans. However, there is a time and a place for it.
Consider it a variation on the V to L to Deadly Diamond. It’s a TTP (Tactic / Technique / Procedure) sadly used to great effect against Officer Brent Thompson. We can certainly use it to our advantage when we have closed with an active killer and are moving in to put him down.
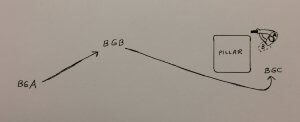
I drew this crude diagram immediately after the 07 Jul 2016 shooting in Dallas which left 5 officers dead and 9 others (plus 2 civilians) wounded. The racist killer started at BGA, advancing on DART Officer Brent Thompson, who was taking cover behind (and “slicing the pie” around his own right side of) a wide concrete column (PILLAR) at A.
At first, the murderer advanced along a forward oblique to his own left (Thompson’s right), but when Officer Thompson ducked back behind the pillar (B) seeking shelter from the incoming fire, LOSING SIGHT OF HIS ASSAILANT, the killer pivoted at BGB and rapidly advanced on a forward oblique to his own right.
Officer Thompson slices the pie around to his right as the killer, advancing on a forward oblique to his own right, closes. Image from video filmed by Randy Biart, obtained for the AP by Mat Otero
As Thompson sliced the pie again to his own right (A), seeking out the assailant, the racist flanked Thompson around the other side of the column (BGC), shooting Thompson in the back, and then, standing over him, shot him multiple times.
As my fighter pilot father said,
Lose sight, lose fight.
Do NOT zig in front of your cover element, if any, before you zag. Nor can we indiscriminately spray “covering fire” to keep his head down at stateside locations (see Legit Covering Fire below). But one partner can keep someone pinned down while the other flanks around. This is the central tenet of Fire and Maneuver. The mantra is:
The force in contact stays in contact while the maneuver element flanks.
It is nothing new.
On 02 Jan 1932, near Brookline, Missouri, one murderer kept Officer Ollie Crosswhite pinned down behind a storm cellar with rifle fire, while an accomplice snuck up behind Crosswhite and killed him with a shotgun blast to the head. Other officers killed in that gun battle, the worst massacre of police in US history (only edging out Dallas for that dubious honor by one KIA), were:
Sheriff Marcell Hendrix
Deputy Sheriff Wiley Mashburn
Charles Hauser
Sid Meadows
Tony Oliver
The other Dallas police officers who gave their last full measure of devotion on 07 Jul 2016 included:
Senior Corporal Lorne Ahrens
Officer Michael Krol
Sergeant Michael Smith
Officer Patrick Zamarripa
Roots of the Dallas Shooting
Ironically, those Dallas cops died protecting protesters who had been swayed by the media lie that all cops are racist fascist murderers who are personally responsible for all the socio-economic imbalances which still exist in our society. If I hadn’t spent years working internal affairs, and crawled up LEOs’ bums with a microscope after every shooting I investigated, I might believe the selective reporting the media is putting out about it too, and I’d probably be out there protesting beside the BLM folks.
But, as Jack Nicholson said in A Few Good Men, they “have the privilege of not knowing what I know.”
In the movies and TV, cops get in major gun battles several times a day and then have the time, energy, and psychological aplomb for a sex scene with their hot co-star right afterward. Hollywood cops don’t spend the rest of their lives after a shooting writing reports, being grilled by Internal Affairs, getting grilled by prosecutors, getting grilled by defense attorneys, giving depositions, testifying, and getting sued by the parents who really should have raised their kid not to rob liquor stores and murder clerks and then break bottles over cops’ heads.
Later, cops’ families are doxed by people they’ve never met who were not there when the cop was in fear for his or her life and assume the cop is a racist ’cause Black people (the vast majority of whom are NOT criminals) called the cops to protect them from one or two Black predators in a predominantly Black neighborhood, when the cop happened to be, through an accident of birth they had no control over, born to Asian or European or otherwise different parents.
The reason I bring this up is because the multiple murderer in Dallas was allegedly upset by the police shooting of Alton Sterling in Baton Rouge. Sterling was a bully and a predator who had a gun, and had threatened other Black people with it. The Black victims of Sterling called the cops to rescue them. They described Sterling as being 300 pounds. There were several Black people there–everybody there (except the cops) was Black. Only one was 300 pounds, had a record of violence and weapons violations, and was carrying a gun.
Put yourself in the officers’ shoes. They were dispatched to look for a 300 pound man who had been threatening others with a gun. When they found a man matching that description, assuming (correctly) that he had a gun and did not use it lawfully or responsibly, they pointed a gun at him and told him not to move.
The intent in pointing a gun at him, at that point, was to PREVENT bloodshed and to protect the people who had called them, as well as themselves, by DETERRING STERLING FROM TRYING SOMETHING THAT COULD EVENTUALLY TURN OUT POORLY FOR ALL INVOLVED, ESPECIALLY STERLING.
The media called that “escalation.” Yes, it was–although those who called it that do not understand Use of Force. The idea was to up the ante till the other guy folds. Sterling did not.
When Sterling resisted, the officer who had drawn his pistol holstered it and went hands-on with his partner. They attempted to tase Sterling, but it did not work (for various reasons I won’t get into here, tasers only work about half the time). During their hands-on struggle, after his partner (who was trying to jam Sterling’s draw) announced that Sterling had a gun, the other partner pulled his own pistol, leveled it at Sterling’s chest, and swore an oath before the Supreme Being of the Universe: “Listen, bro, you f_____g move, I swear to God–!“
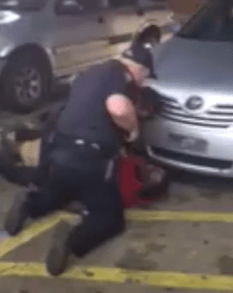
The last moments of Alton Sterling’s life, tragically cut short by Sterling’s own poor choices. The head against the car’s grille belongs to the other officer, who was jamming Sterling’s draw and yelled “Gun!” Image from PBS.org
At that point, the officer did not explicitly state what would happen if Sterling continued to try to pull his handgun against the other officer’s hand pressure that was–so far, at least–keeping him from doing so. But a reasonable person could easily infer what might happen.
Sterling was not a reasonable person. He continued to try to draw his handgun on the officers who were trying to arrest him. Not for nothing, Sterling had a revolver, which can easily and repeatedly be shot through a pocket (we have demonstrated this in Heloderm classes). Although any given video only shows one angle and can be deceiving, Sterling was clearly struggling, with his head off the ground. His own behaviors, before and during the struggle, got him shot.
That was why a racist with military training later decided he was justified in murdering five officers and shooting 11 other people in Dallas, while those officers were keeping a BLM rally safe.
Legit Covering Fire
Again, we cannot indiscriminately shoot in a bad guy’s general direction. We’re responsible for the final resting place of every bullet we launch.
However, there is a technique called Distraction Fire that is gaining traction here in the US, and being taught to some SWAT teams, that might be a suitable substitute.
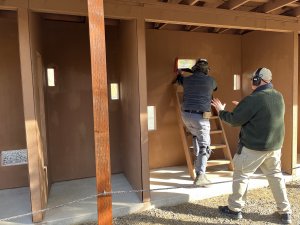
Say a wannabe sniper is holed up in the stadium “box” pictured below, and you need to keep him pinned down so other members of your team can move up the bleachers to where they can arrest or take him out.
You CANNOT shoot at him through the side of the box. There might be people on the other side of that wall (think Breonna Taylor) who are NOT shooting at you.
But you may be able to direct fire into thick portions of the structure–window frames, door jambs, especially those over his head–that you know will stop a bullet. This minimizes risk to bystanders (including any hostages he may have). The noise, paint chips, and / or plaster knocked off the ceiling may keep his head down while they move.
Rather than shooting through the box at threats she cannot positively locate within it, the cover officer down below can direct her fire at the I-beam columns that are supporting the roof, above where the suspect is holed up, while the contact team climbs the bleachers. Once they have flanked and made positive ID of the threat, they can take him out.
Parts of this document, particularly those about the Dallas massacre, were previously published in the After Action Report Force on Force for Instructors 14 May 2022.
–George H, lead instructor, Heloderm LLC
About the Author (the “I’m So Swell” Appendix)
–or–
Why You Can Believe This
They taught us long range reconnaissance, ambush, and other types of patrolling when I went through the US Army 4 ID’s Primary Noncommissioned Officer Course, PNCOC, aka RECONDO. I also practiced patrolling at the SP Academy, and the Volant Scorpion Airbase Ground Defense “evaluation” (Military Airlift Command couldn’t have a “school”–schools were the purview of ATC, the Air Training Command–so they called Volant Scorpion an “eval”) at Little Rock AFB in Arkansas. I was in the Army of the Air Force, as it were, before I joined the Army Guard.
I have done a lot of foot patrolling–in real life, as well as training–on soil both foreign and domestic. In Saudi during Ops Desert Shield and Desert Storm I walked foot patrols around the ends of our base’s “footprint,” looking for Tangos with MANPADS (hand held surface to air missile launchers). Most of our patrolling in Saudi, and decades later in support of OIF, was in a Hummer, but when we needed to check something out we dismounted. Same when I was an Area Security Supervisor in Kuwait in 2008.
Likewise when I was a patrol officer on a small town PD, and a law enforcement park ranger in Wyoming. Just about every single dispatch was some sort of “movement to contact.” As a cop I learned to park half a block down from the suspect location, then hoof it stealthily through the neighbor’s yards, rather than parking right in front of the house like on TV.
In the Border Patrol, as the name implies, most of my days were spent patrolling, often on foot. A former Navy SEAL I worked with in the Patrulla Fronteriza told me to “Save the stealth for when you need it,” meaning, move quickly and efficiently till you are almost within earshot of your objective, then slow down and start “turtle tracking.” Perhaps surprisingly, the same TTP–moving fast without being too concerned about noise discipline, works against elk during the rut (archery season).
I was in daily MILES exercises, six months out of each year, for three years in a row, when I worked in nuclear security. About half of our scenarios involved quasi-static defense of a nuclear “resource,” but the other half involved intentional movement to contact in “recapture” operations for nuclear facilities and materials.
I have also “run to the sound of the guns” on the live, two-way rifle range, though there are probably smarter ways to do it than what we used, which is why I wrote this article.


 On hard surfaces–concrete, parking lot, aircraft tarmac, shopping mall–bullets don’t bounce like billiard balls. They tend to deform and then skip along parallel to, or at only a slight angle off of, the surface they hit, be it the ground or a concrete / brick wall. Going prone in the mall puts your torso in line with any bullets he snatches onto the deck between you.